
You’re probably wondering what kind of meals you will eat while on the river. Perhaps you are remembering a family joke about Dad’s horribly-burnt “camp specialty.” That said, camp meals can be something to put up with, or they can be a high point of the trip, as they are with Aggipah River Trips.
We use Dutch-ovens every day to turn out memorable meals. We bake cinnamon rolls, biscuits, chocolate layer cakes, berry cobblers, and a variety of breads. We also use Dutch-ovens to prepare main courses such as spinach-feta stuffed chicken breasts and lasagna.
If you’re like most folks, you’re probably curious about Dutch-oven cooking. We are more than happy to teach you everything we know. If you have a specific recipe you’d like to prepare in a Dutch-oven, bring it on the trip and we’ll do it together. Just let us know what ingredients we need to purchase before your river trip. We’ll do as much cooking together as you’d like, you will by no means be assigned KP duty for the duration on the trip!
If you are anxious to get started on your Dutch-oven cooking before you join us on the river, how about making some biscuits in your back yard? Baking biscuits is the easiest way to learn temperature control. You can get fancy later. Some tools you’ll need:

- Aluminum or iron Dutch-oven with a flat, not rounded, lid
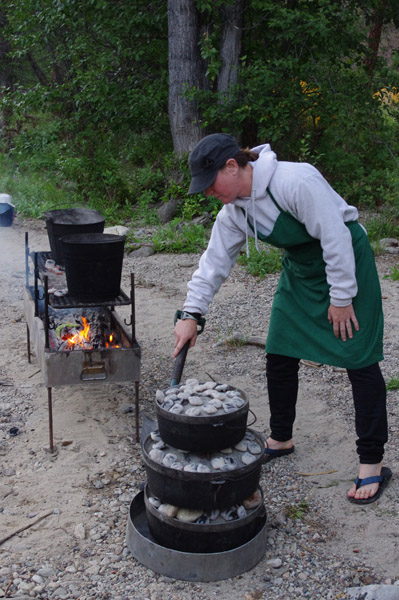
- Long-handled pliers(for easy lid-lifting and moving your Dutch out of the coals)
- Charcoal and lighter fluid
- Small shovel or trowel(for transporting hot coals)
The basic principle of Dutch-oven cooking is to cook from the top down. If you are using an iron oven, you’ll need to pre-heat the lid by placing it in the fire or coals as you are getting your ingredients ready to go. Also, get your coals heated up before you start mixing the batter! Coals are ready to go when they are gray in color.
Start with a box of Bisquick or other biscuit mix. Stir up a dough according to package directions. Wipe the bottom of your Dutch-oven with cooking oil and place egg-sized balls of dough in the oven, leaving a little space between each lump. You may warm the oven before you add the dough, but it isn’t necessary(if you are using an iron oven, don’t forget to preheat the lid). Spread out a thin bed of coals on the ground, and put the oven on top. Close the oven with the heated lid, and shovel an even layer of coals on top of the lid. Remember, you are cooking from the top down-use more heat ON TOP of your oven than on the bottom. You won’t risk scorching the bottoms of your biscuits if you have less direct heat on them. If your heat is right, you’ll have biscuits browned top and bottom in 10-15 minutes.
*You may not be too proud of your first attempt! Take the lid off, throw it back on the fire to re-heat, scrape the mess out of the oven into the garbage, wipe out the oven with an oily paper towel, refill with dough and try again until you get acceptable biscuits. And if you’re still having problems, we’ll show you how it’d done on the river, where your biscuits will taste better anyway!